Form API Request Response Format
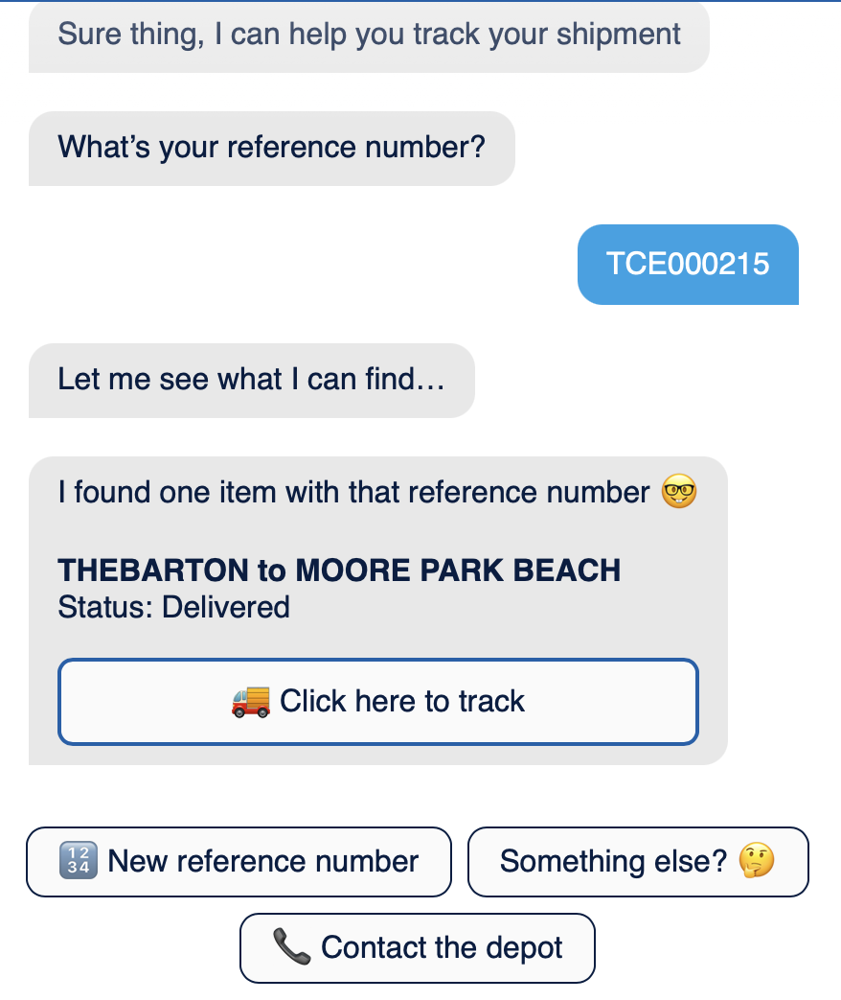
With Helpfruit Forms, an API request can send data back to the bot and display this information in chat.
- This can be useful when calling out to external APIs to get additional live information.
- For example, your customer can interact with the bot to get information about their shipment or other personalized information:
In this article
Response types
Several different response types are possible:
- Simple text response written back to the bot
- Markdown formatted response
- Messages with buttons
- Adaptive cards - allowing for a highly configurable card layout
Top level response format
| Field | Type | Required? | Options | Example |
| status | string | yes | success|failure | success |
| statusCode | string | yes | -1 (Failure) |1 (Success) | 1 |
| messageType | string | yes |
"AdaptiveCard" | "Text" |
Text |
| message | string | yes |
This is my message This __is__ my message This has a (link)[https://faqbot.ai] |
|
| attachments | array(Attachments) | no | see below | see below |
Message Type
Adaptive card allows for parsing the message string as an adaptive card serialized to string format vs a bot framework format. Please contact us for details on what is supported.
The serialized adaptive card is placed in the "message" field.
Text is used for all other message types, i.e. simple text, markdown, message with buttons
Example API response: simple message

View code for this example
{
"status": "success",
"statusCode": 1,
"messageType": "Text",
"message": "The weather today is nice and sunny"
}
Example API response: markdown format
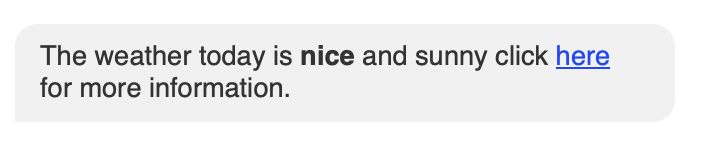
View code for this example
{
"status": "success",
"statusCode": 1,
"messageType": "Text",
"message": "The weather today is **nice** and sunny click [here](https://weather.com/city/auckland) for more information"
}
Attachment format
Helpfruit supports different types of button attachments in API responses. This allows users to quickly and easily take a follow-up action - eg get more information or go to a specific web page.
All button attachments include the following field: attachmentType: 0
Types of button
Response button
- displayText - Text shown on the button, eg "Click here"
- replyText - Text that will come back to the bot when the user clicks the button. Optional. Useful when you want short, simple button text, but more detailed response, ie to trigger a specific answer via a long question
Custom action button
These buttons can also set context via the action field. This can be used by the API to set IDs, authentication information, or other information that is needed in subsequent forms.
- displayText - Text shown on the button
- action - Custom action to perform, see Custom action format info below
Open url button
- displayText - Text shown on the button
- url - Url to open when the button is clicked
Example - API response with button attachments
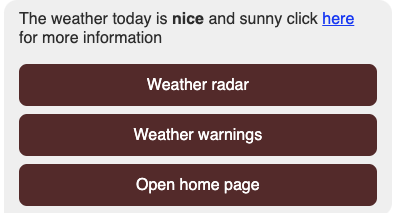
View code for this example
{
"status": "success",
"statusCode": 1,
"messageType": "Text",
"message": "The weather today is **nice** and sunny click [here](https://weather.com/city/auckland) for more information",
"attachments": [
  {
    "type": 0,
    "displayText": "Weather radar",
    "replyText": "Show me the weather radar"
  },
  {
    "type": 0,
    "displayText": "Weather warnings",
  },
  {
    "type": 0,
    "displayText": "Open home page",
    "url": "https://weather.com"
  }
]
}
Custom action format
Within the button attachment, custom actions can be specified, to allow selected actions to be triggered in the bot via the button shown to the user.
See custom actions documentation for more details on available actions.
Custom action formats
| Field | Type | Required? | Options | Example | Notes |
| type | Number | Y |
3 (Trigger Form) 5 (Trigger Engagement By Event Name) |
3 5 |
See value field format table |
| value | String | Y | See value field format table |
calculator=c53fe92a-8362-463e-94eb-06f13fa3fc13 newsletter-signup |
See value field format table |
| context | Object | N |
{ "contextKey": "contextValue", "name": "Clementine" } |
These fields need to first be added as bot context keys. Setting context allows for storing information that can be used by subsequent forms without having to ask the user, eg store a Sales Order number. Context is also displayed in live chat and conversation history - so you can attach identifiers to buttons and have that context visible in the portal (eg a marketing campaign ID). The context is only set when the button is clicked. |
Custom actions: value field format by type
The format of the value field that must be used for each custom action type is shown below.
| Type | Action | Value field format | Example of value field |
| 3 | Trigger a form | calculator=FORM_ID_GUID | calculator=c53fe92a-8362-463e-94eb-06f13fa3fc13 |
| 5 | Trigger an engagement by event name | EVENT_NAME | newsletter-signup |
Example: API response with custom actions
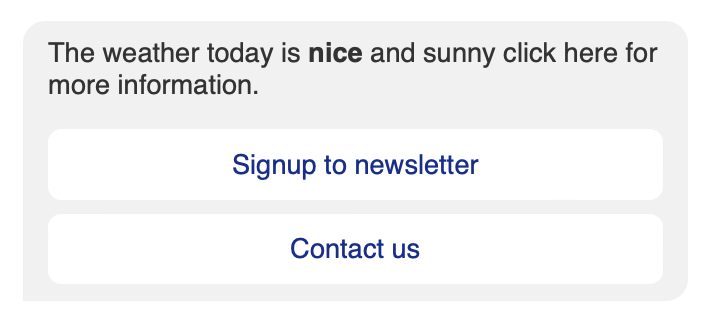
View code for this example
{
"status": "success",
"statusCode": 1,
"messageType": "Text",
"message": "The weather today is **nice** and sunny click [here](https://weather.com/city/auckland) for more information",
"attachments": [
      {
        "type": 0, // Button
        "displayText": "Signup to newsletter",
        "action":
        {
          "type": 5, // Trigger page event
          "value": "newsletter-signup"
        }
      },
      {
        "type": 0, // Button
        "displayText": "Contact us",
        "action":
        {
          "type": 3, // Activate form
          "value": "calculator=c53fe92a-8362-463e-94eb-06f13fa3fc13"
        }
      }
    ]
}
Example API host (in NodeJS) to test message responses
A simple node js web server to handle API requests and respond back with some examples.
- Use this to quickly test how the bot displays various response types.
- Use with a port-forwarder, i.e. NGROK to expose the API to the bot.
const http = require("http");
const url = require("url");

const requestListener = function (req, res) {
  const parsed = url.parse(req.url, true); // Parse URL with query string

  const examples = {
    1: {
      status: "success",
      statusCode: 1,
      messageType: "Text",
      message: "The weather today is nice and sunny",
    },
    2: {
      status: "success",
      statusCode: 1,
      messageType: "Text",
      message: "The weather today is **nice** and sunny click [here](https://weather.com/city/auckland) for more information",
    },
    3: {
      status: "success",
      statusCode: 1,
      messageType: "Text",
      message: "The weather today is **nice** and sunny click [here](https://weather.com/city/auckland) for more information",
      attachments: [
        {
          type: 0,
          displayText: "Weather radar",
          replyText: "Show me the weather radar",
        },
        {
          type: 0,
          displayText: "Weather warnings",
        },
        {
          type: 0,
          displayText: "Open home page",
          url: "https://weather.com",
        },
      ],
    },
    4: {
      status: "success",
      statusCode: 1,
      messageType: "Text",
      message: `✅ We have found your order number: **${parsed.query.orderId}**`,
      attachments: [
        {
          type: 0, // Button
          displayText: "📝 - View order",
          url: `https://store.com?order=${parsed.query.orderId}&email=${parsed.query.email}`,
        },
        {
          type: 0, // Button
          displayText: "Contact us",
          action: {
            type: 3, // Activate form
            value: "calculator=c11fe92a-4444-555e-11aa-06f13fa3f123,
            context: {
                 "userName": "Clementine Citrus",
                  "contactMethod": "apiResponse"
             },
          },
        },
      ],
    },
  };

  if (parsed.query.ex && examples[parsed.query.ex]) {
    res.setHeader("Content-Type", "application/json");
    res.writeHead(200);
    res.end(JSON.stringify(examples[parsed.query.ex]));
  } else {
    res.writeHead(200);
    res.end("<html><body<div>test</div></body></html>");
  }
};

const host = "localhost";
const port = 9001;

const server = http.createServer(requestListener);
server.listen(port, host, () => {
  console.log(`Server is running on http://${host}:${port}`);
});