Ticketing: setup guide for admins
Helpfruit Ticketing helps your team manage customer support work in one place. You can receive support requests, send an automatic first reply, organise tickets by status and type, assign work to teammates, and respond from within Helpfruit.
In this article...
What ticketing does
Ticketing gives your team a shared place to manage support requests. Ticketing includes:
- rapid setup for ticket types, statuses, priorities, and SLA policies — use the defaults or customise them to suit your organisation
- a ticketing email address for creating tickets by email
- multiple ticket views, including Board, Table, Agent, Inbox, and Calendar
- ticket assignment, comments, history, and customer records
- Helpfruit-powered automatic first replies and draft replies for later messages
- optional AI processing for analysing tickets and comments
Before you start
Before setting up ticketing, make sure you:
- have admin access to the Helpfruit portal
- have a Standard or Premium Helpfruit plan
- know which team members should receive and manage tickets
Set up Ticketing
Enable Ticketing
- In the Helpfruit portal, open Configuration > Ticketing.
- Turn on Enable ticketing system.
- If prompted, select Create default Ticketing setup to create the default ticket types, statuses, and priorities.
This gives you a starting configuration that you can customise later.
Set up email
Your Ticketing configuration includes a unique ticketing email address. Customers or staff can use this address to create support tickets by email.
- Go to the Email setup section.
- Copy your ticketing email address.
- Optional: enter an Organisation name for emails.
- Select Save.
The organisation name appears in outgoing ticket emails. If left blank, Helpfruit uses your company name.
Auto-forward emails to create tickets
After you set up and test Ticketing, you can set up auto-forwarding rules in your support inbox to route support emails to your ticketing address. This means you do not need to change your existing support email address to use Helpfruit Ticketing.
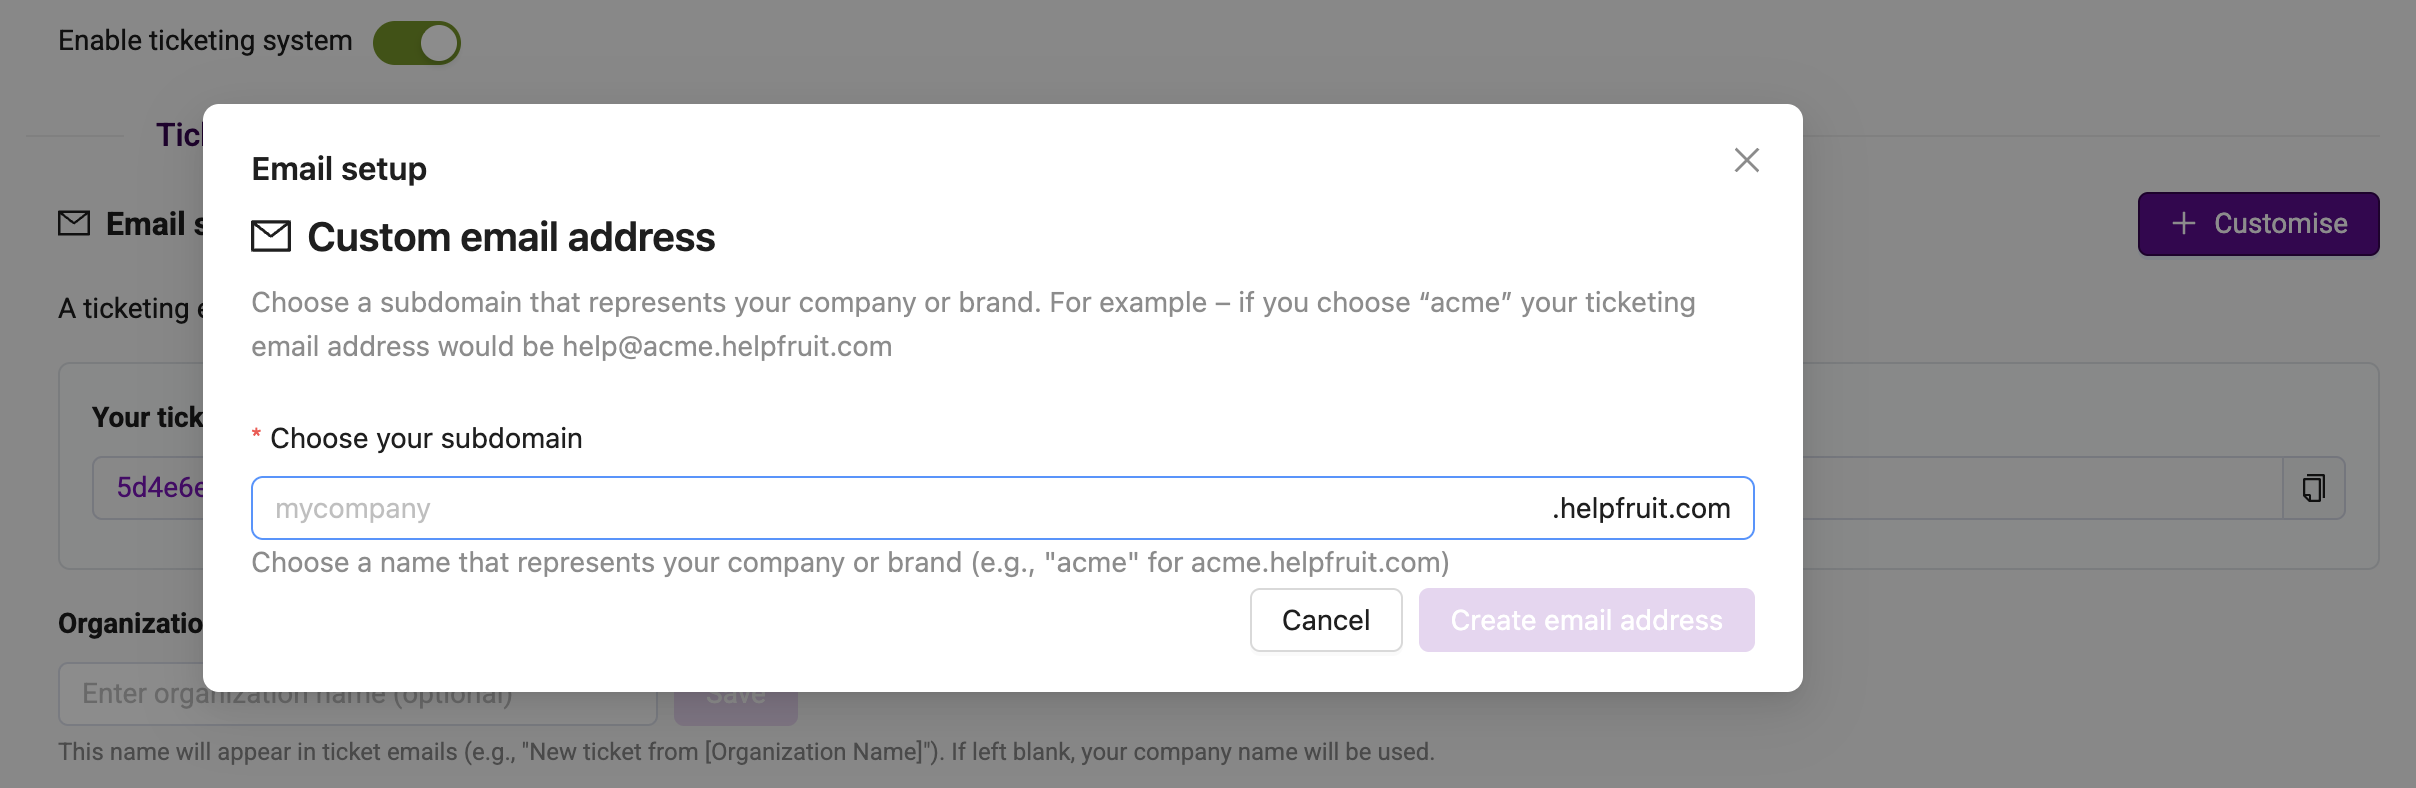
Custom email address
You can also set up a custom email address. Select Customise to set this up.
Review core ticket settings
From the Ticketing configuration screen, review and complete these sections:
Ticket types
Categories such as support question or bug report.
Default email ticket type
The default type for tickets created by email.
Ticket statuses
Workflow stages such as New, In Progress, Pending Customer, Resolved, and Closed.
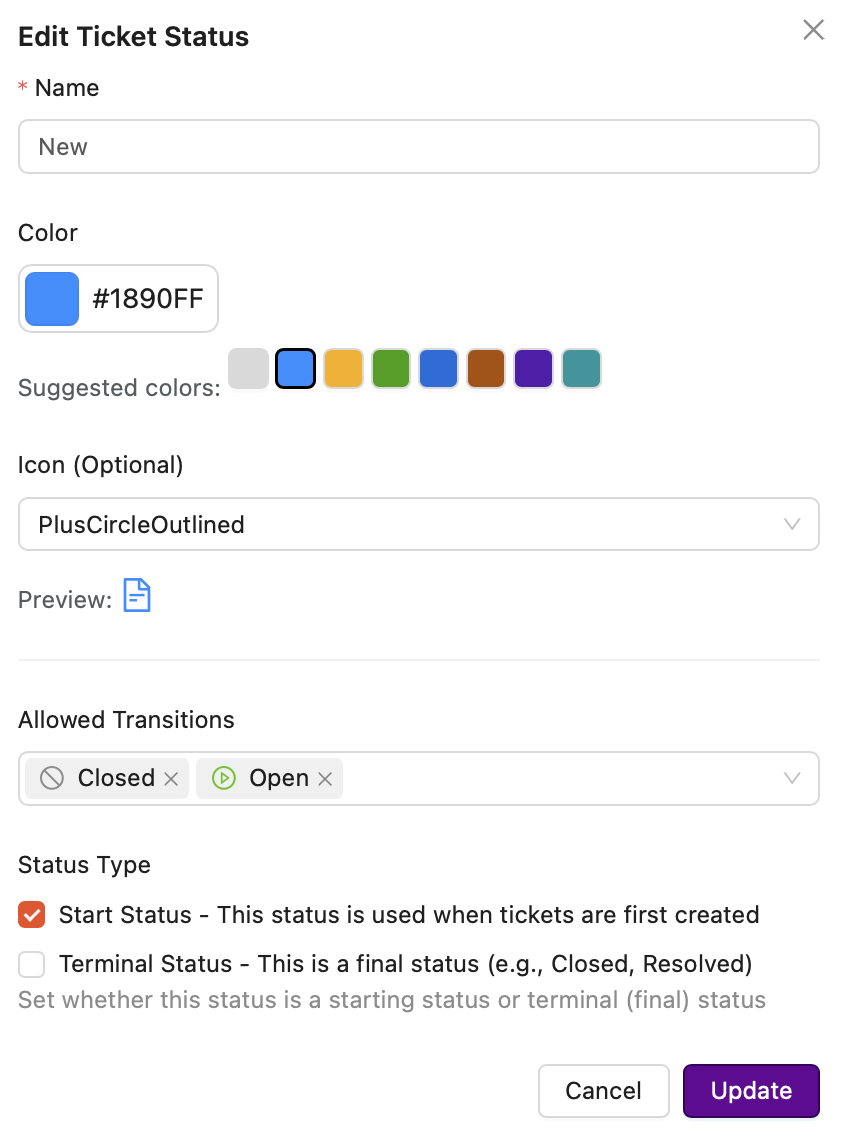
- Each status can have a colour and icon. You can also set it as a start or terminal status.
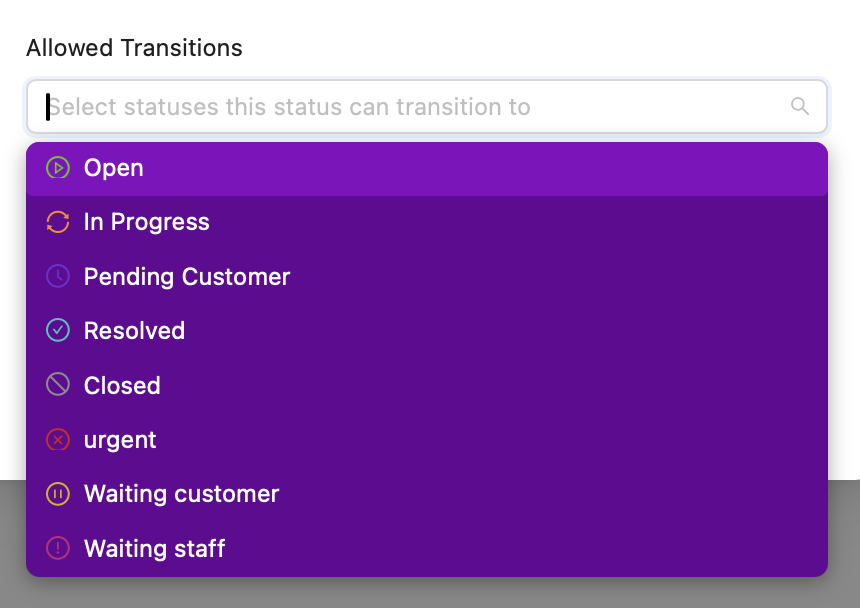
- You can specify allowed transitions — the statuses that this status can move to. This affects whether users can drag and drop cards in Board view.
Ticket priorities
Urgency levels for triage and reporting.
SLA policies
Service targets for response and resolution.
All of these settings are configurable to suit your organisation.
Set up AI processing
Ticketing includes an AI processing option. Access it from Configuration > Ticketing.
When AI processing is enabled, AI can analyse new tickets and comments and change these fields:
- status
- priority
- type
- assignee
You can use the default prompt or customise it to suit your workflow.
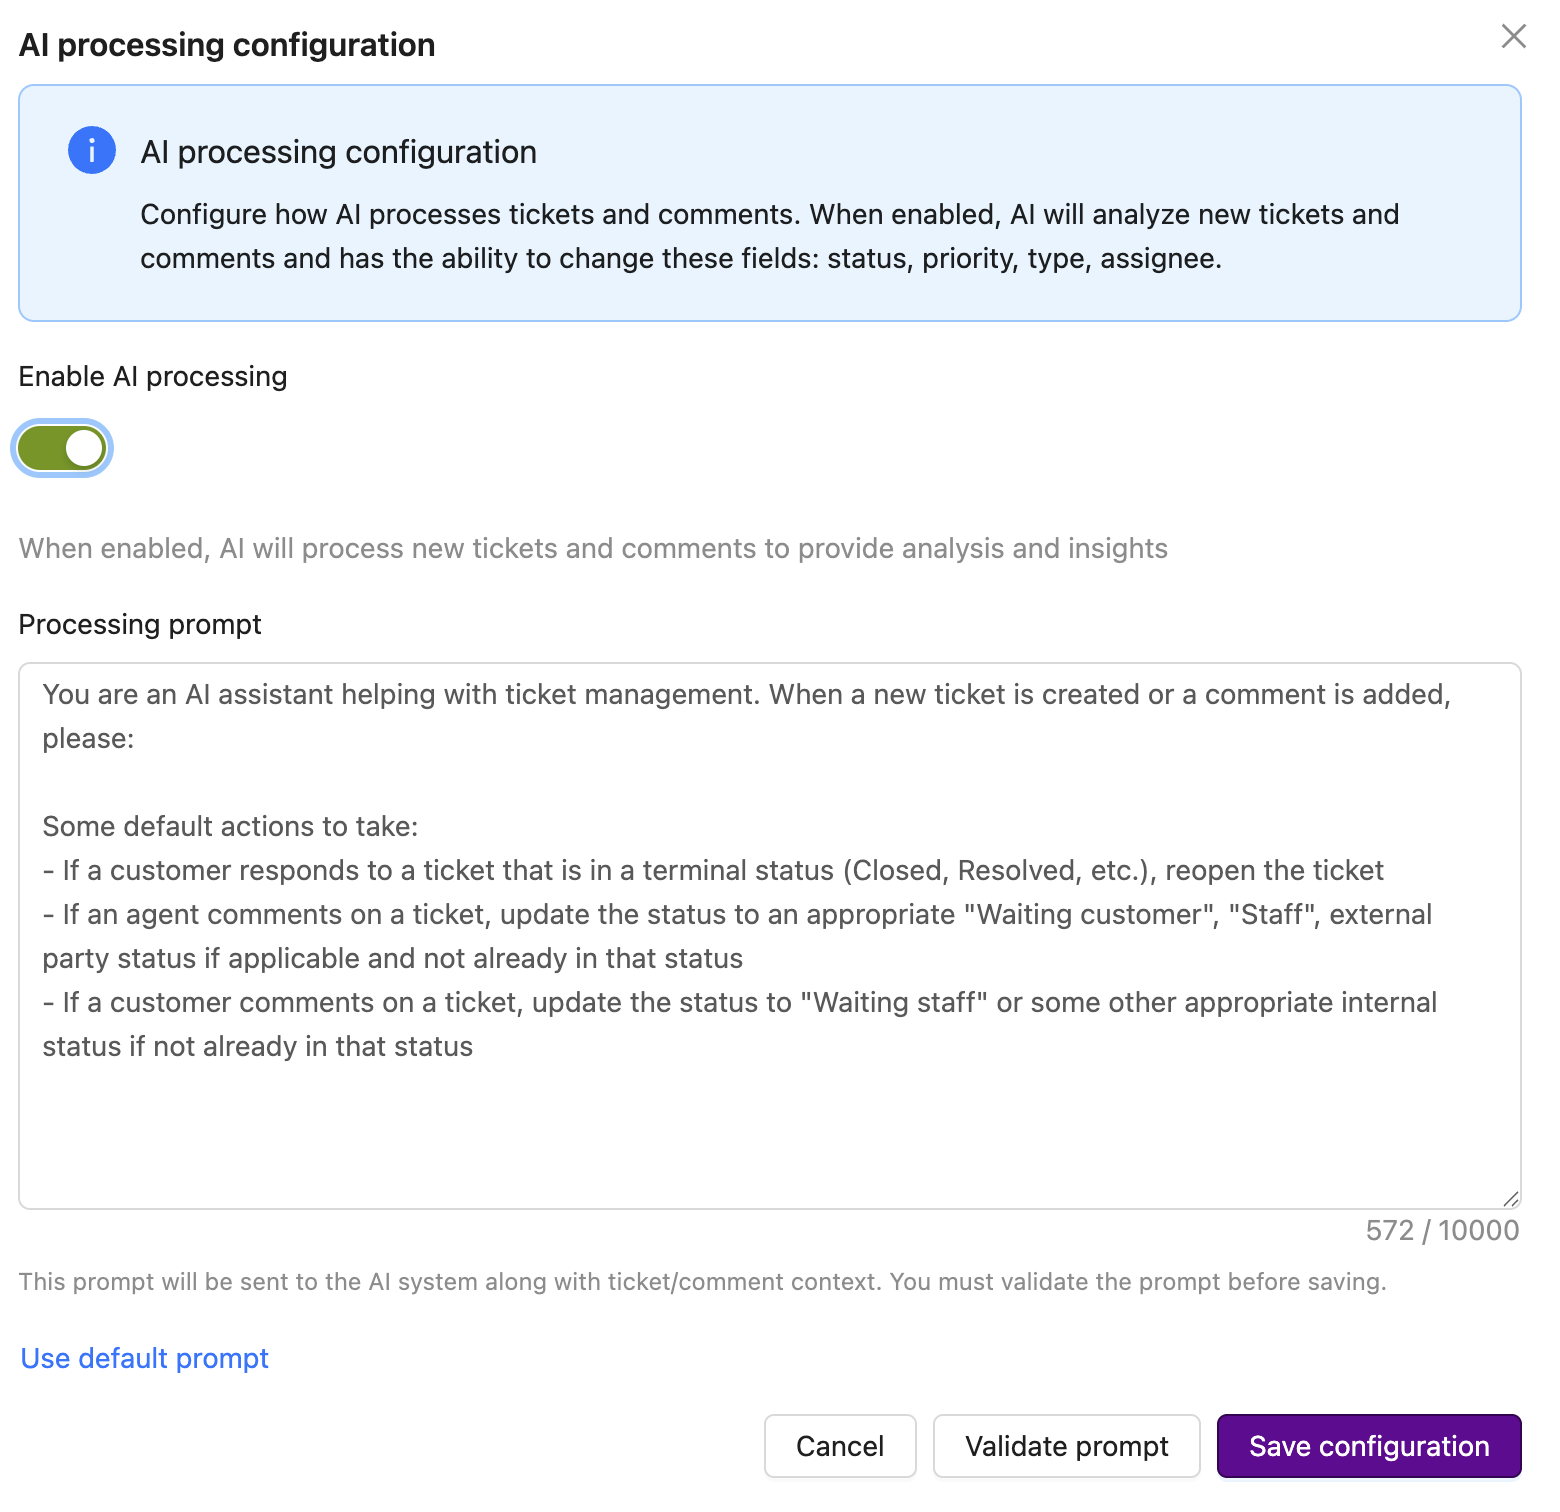
Enable AI processing
- Go to Configuration > Ticketing.
- Open AI processing configuration.
- Turn on Enable AI processing.
- Enter or review the Processing prompt.
- Select Validate prompt.
- Select Save configuration.
You can also select Use default prompt to start from the default AI instructions.
Important: Review AI-generated changes before relying on them in live workflows.
User roles
Use roles to control who can configure Ticketing and who can work on tickets.
| Role | Access |
|---|---|
| Admin | Can manage Ticketing configuration and tickets. |
| Agent Admin | Can manage Ticketing configuration and tickets. This is a combined live chat and Ticketing administrator role. |
| Ticket Agent | Can view and edit tickets. |
When to use each role
- Use Admin for platform or product administrators.
- Use Agent Admin for people who manage Ticketing.
- Use Ticket Agent for team members who handle tickets but do not need to change Ticketing configuration.
Roll out Ticketing
After you finish the initial set-up, test your configuration before rolling it out more widely.
Recommended minimum checks
- create a test ticket by email, including formatted content such as links, headings, or lists, and confirm the content appears correctly in Ticketing
- create a test ticket directly in Ticketing
- create a test ticket from a live chat conversation, if your team uses live chat
- confirm the default email ticket type is correct
- check that statuses and allowed transitions match your workflow
- close a test ticket, reply to its ticket email address, and confirm the ticket reopens as expected
- confirm the right team members can view and manage tickets
- test AI processing with a safe prompt before using it in production