Ticketing: user guide
Helpfruit Ticketing gives your team a shared place to manage support requests. You can review incoming tickets, update ticket details, reply to customers, and track work across your team from one place.
This guide is for people who use Ticketing day to day. If you are an administrator, you may first need to set up Ticketing.
In this article...
Before you start
Before using Ticketing, make sure:
- Ticketing has been enabled for your Helpfruit account
- you have been given a Ticketing role, such as Ticket Agent, Agent Admin, or Admin
- your team has set up ticket types, statuses, and priorities
- you know how your organisation wants tickets to be assigned and managed
- you have access to the Helpfruit portal
You may also need:
- a ticketing email address set up by your administrator, if your team creates tickets by email
- Helpfruit articles or Q&A content in place, or an Assistant with access to your content, if your team uses AI-generated replies
If Ticketing is not visible, contact your Helpfruit administrator.
How tickets are created
Tickets can be created:
- by email, using your organisation's ticketing email address
- from a Helpfruit bot or live chat conversation
- directly in Ticketing
Add tickets by email
Customers or staff can send an email to your ticketing email address to create a support ticket. You can also set up auto-forwarding rules in your inbox to route support emails to this address.
The default ticket type for tickets created by email is set by your ticketing administrator.
Ticketing displays supported email content and formatting, such as links and lists, in the ticket so agents can review the customer’s message.
Add tickets from a Helpfruit conversation
If a Helpfruit conversation needs follow-up, you can turn it into a ticket. This includes both bot and live chat conversations.
- Open the conversation.
- Select Create ticket.
- Select a ticket type.
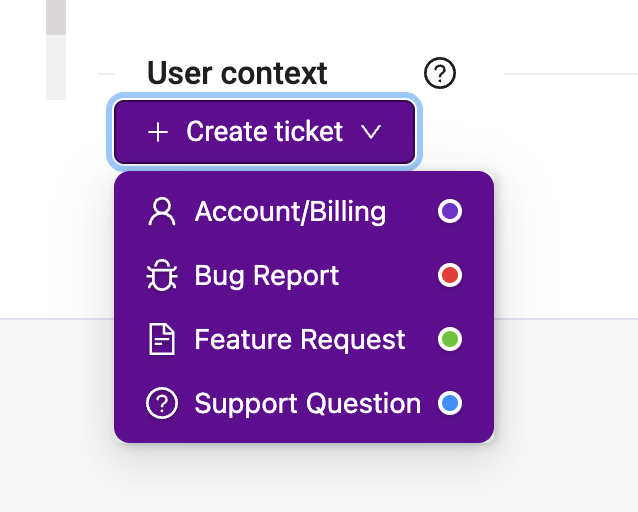
- Review the details. Information from the conversation, including the customer name, contact details, and conversation history, is added automatically.
- Select Create ticket.
Add tickets in Ticketing
In any Ticketing view, select Create ticket to create a new ticket directly.
Work with ticket views
Ticketing includes several views to help you manage work in different ways. All views include filters so you can focus on the tickets you need.
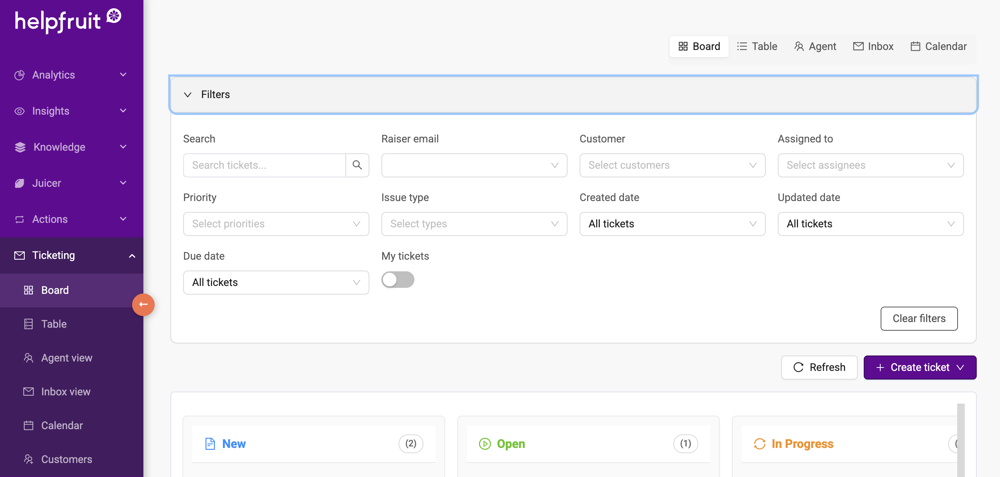
Board view
Board groups tickets into status columns such as New, In Progress, Pending Customer, Resolved, and Closed.
Use this view to track workflow at a glance. Depending on your workflow settings, you may also be able to drag and drop tickets between columns.
Table view
Table shows tickets in rows with columns such as ticket number, subject, status, type, priority, raiser, assignee, customer, email status, created date, updated date, and due date.
Use this view when you need to sort, scan, or compare ticket details quickly.
Agent view
Agent groups tickets by assignee so you can see each team member's workload.
Use this view to check ownership and balance work across the team, or just focus on your own tickets.
Inbox view
Inbox shows tickets in an email-style view.
Use the available filters to focus on the tickets you need. You can filter tickets by date or category, depending on your Ticketing configuration.
Calendar view
Calendar shows when tickets are due.
Filter tickets
Use Filters to narrow the ticket list and focus on the work you need to manage.
Available filters include:
- search
- raiser email
- customer
- assigned to
- priority
- issue type
- created date
- updated date
- due date
- my tickets
Select Clear filters to reset the current filter set.
Open and update a ticket
Open a ticket
- Open any Ticketing view.
- Select the ticket number or ticket card.
Update ticket details
When you open a ticket, you can review and update details including:
- subject
- contact or person
- customer
- type
- status
- priority
- due date
- assignee
You can also choose to suppress email notifications for a ticket. When suppressed, no emails are sent from the ticketing system to the customer.

When customers receive emails
Customers can receive email updates from Ticketing at these points:
- When a ticket is created
A confirmation or first email is sent when the ticket is created, regardless of whether it was created by email, from a Helpfruit conversation, or directly in Ticketing. - When an agent adds a public comment
Public comments are emailed to the customer. Internal comments are not sent. - When a ticket is closed
The customer receives an email when the ticket is closed.
If Suppress email notifications is turned on for a ticket, these emails are not sent.
Ticket history
Ticket history shows a timeline of actions on the ticket from the point of creation.
It also shows who took the action, such as the system, a user, or a customer, and whether the action was made by AI.

Respond to a ticket
Open a ticket to review the conversation and add comments.
Use comments to respond to the customer’s question or request.
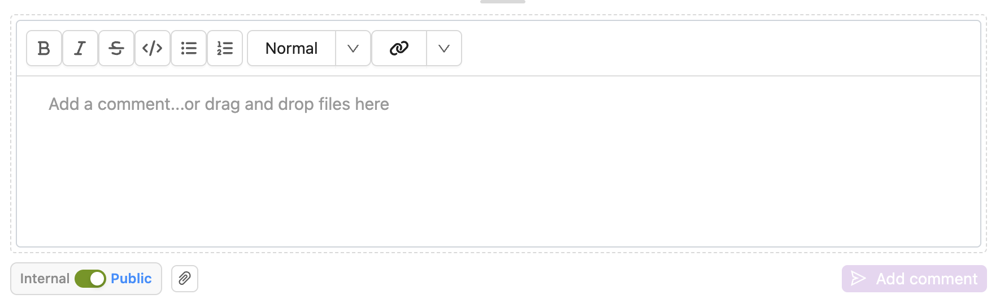
- Type your message.
- Add any relevant attachments.
- Choose whether the comment is internal or public.
- Select Add comment.
Internal comments are not sent to the customer and can be used for team notes.
Public comments are sent by email to the email address on the ticket.
After you add a comment, the conversation updates to show it. If another agent changes the ticket while you have it open, refresh the ticket to view the latest details.
Use AI replies and drafts
Helpfruit Ticketing can use your existing Helpfruit articles and Q&A to help with replies.
First replies – an immediate answer
If Helpfruit already has information that may answer the customer's question, it will send an automatic first reply when the ticket is created.
For example –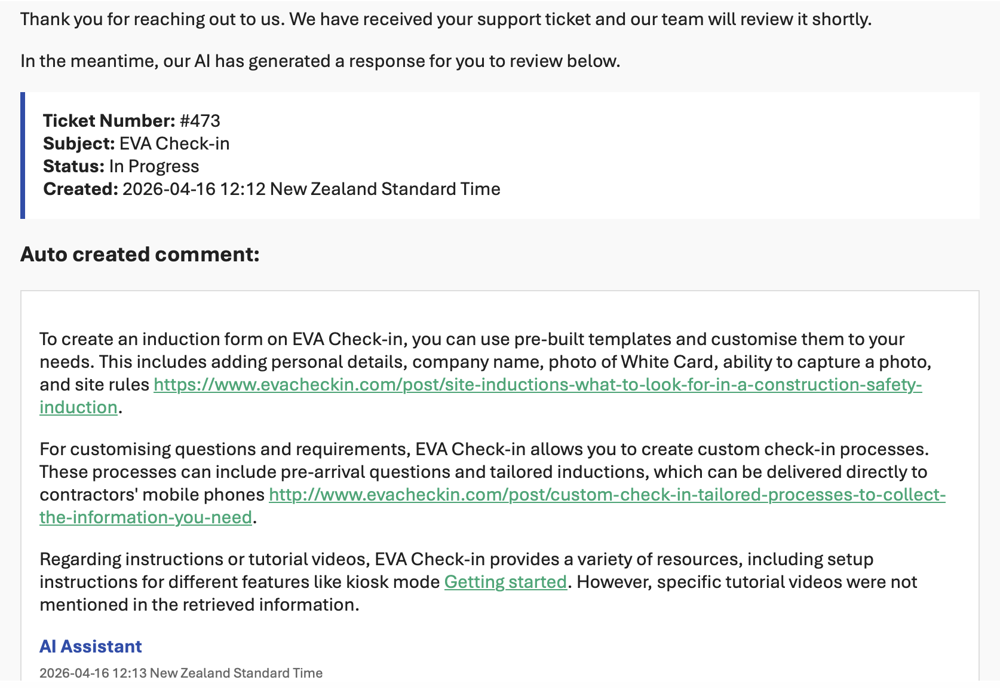
The customer can then close the ticket if the reply resolves their issue. If they do, the ticket moves to closed in the Helpfruit portal.
If the customer replies to a closed ticket by email, Helpfruit reopens the ticket so your team can continue the conversation.

Subsequent replies – AI drafts
If the customer replies again, AI does not automatically send another response. Instead, it creates a draft reply in the Helpfruit portal for you to review, edit, and send.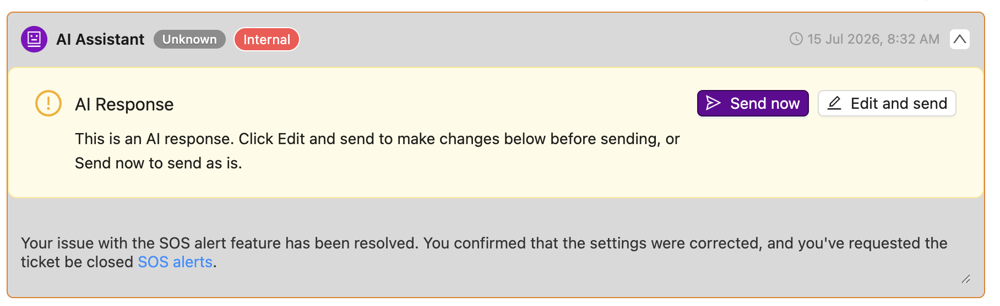
Important: Review AI-generated replies before sending them to customers.